
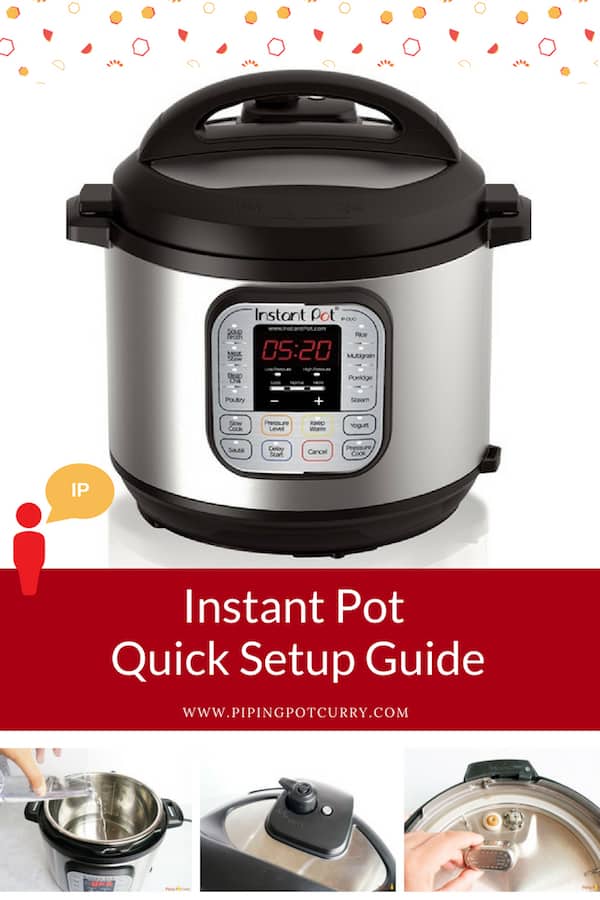
Want to get started with your new Instant Pot, but confused how? You have come to the right place. Here is the guide that you have been looking for, with step-by-step photos to get you started. See all parts of the instant pot, and do the water test with me.
I joined the Instant Pot tribe more than an year back and there has been no going back. Like me, I am sure you are thinking “do I really want to spend the time learning one more gadget that I might not use for long and will occupy counter space?”. Let me assure you IT IS NOT HARD, and the Instant Pot is here to stay. It has taken the community by a sweep and found many ardent fans and proud converts. You are all set to join the tribe, then check out my detailed post about which instant pot to buy. Then come back to this guide. So let’s begin!
I know the instant pot manual that comes along with the pot can be hard to read and hence I am sharing this easy to read/use guide with lots of pictures to show the details.
What is an Instant Pot?
It is a device that combines an electric pressure cooker, slow cooker, rice cooker, steamer, saute and yogurt maker in one handy unit. It can speed up cooking time, especially for meats, grains and lentils. I have the Instant Pot DUO60 6 Qt 7-in-1 Multi-Use Programmable Pressure Cooker. This is their most popular model, which does 7 main functions – Pressure Cooker, Slow Cooker, Rice Cooker, Sauté, Yogurt, Steam & Warm.
You might also find these posts helpful: The Instant Pot Language: Acronyms & Terminology, Which Instant Pot Buttons to Use? and How to Clean your Instant Pot.
What parts does the Instant Pot ship with?
- Instant Pot Base Unit
- Stainless Steel Inner Pot
- Power Cord
- Condensation Collector
- Lid
- Accessories – Measuring Cup, Trivet, Ladles
- User Manual, Quick Reference Guide & Recipe Book
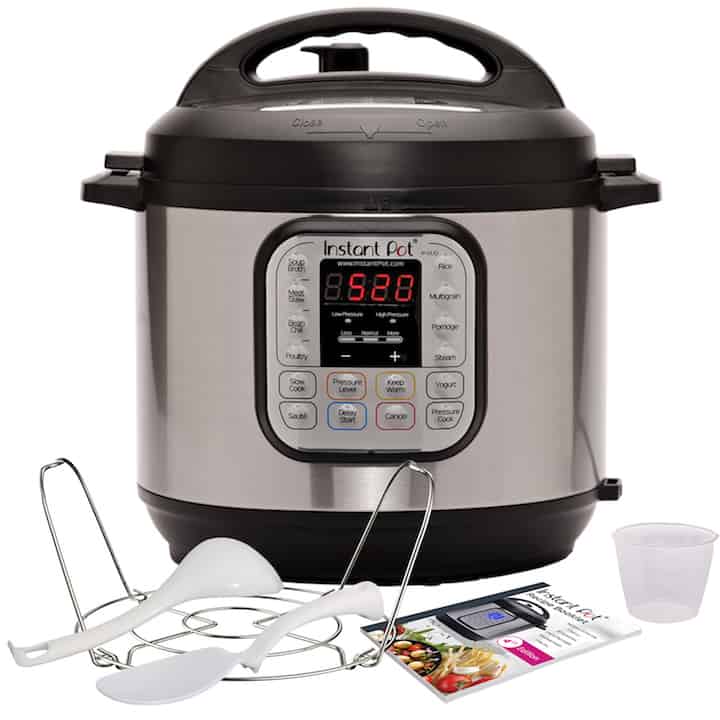
Note: Each instant pot comes with the above accessories and documentation. However they may look different depending on the model and version.
How to Setup the Instant Pot?
The main things that are needed to be done before using the Instant Pot are highlighted in bold italics.
Instant Pot Base Unit
This is the main unit of the instant pot with the control panel and display. You will place the stainless steel inner pot inside the base unit for use.
Stainless Steel Inner Pot
This inner pot is what you will use for cooking. Wash the inner pot before first use. Dry it completely before use. Place this into the base unit of the instant pot.
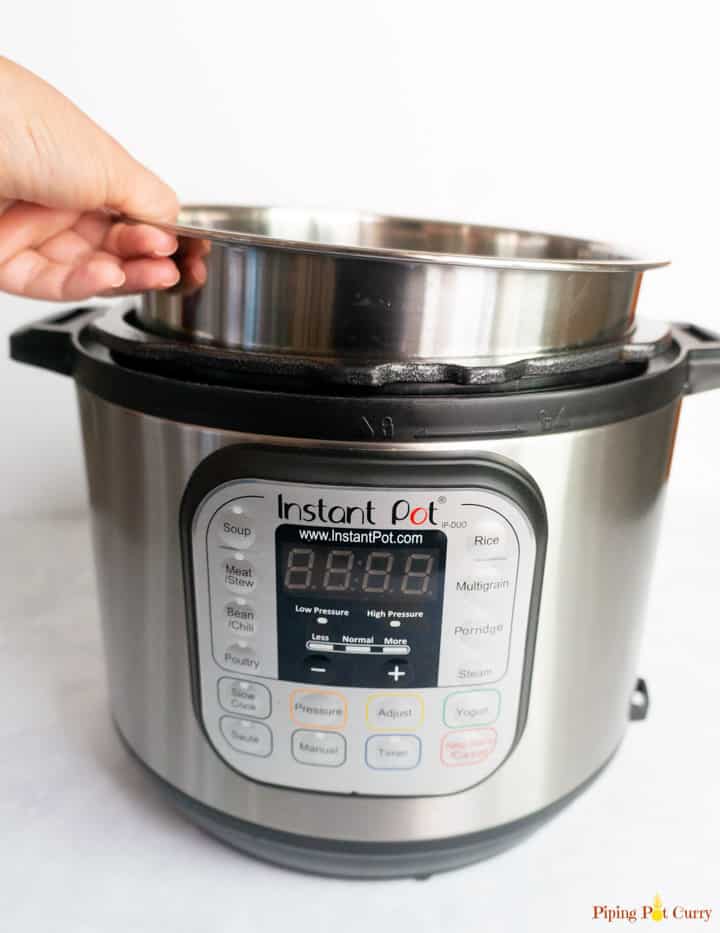
Tip: I like to have an extra inner pot, so I can quickly cook multiple things one after the other. There is also a non-stick ceramic inner pot if that is of interest to you.
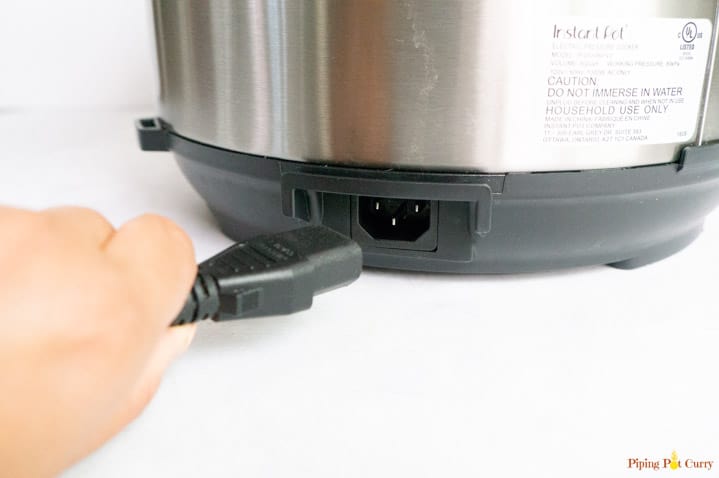
Power Cord
Attach the power cord to the slot on the back of the base unit.
Condensation Collector
This is a small flat plastic cup that comes with the instant pot. It collects any drippings from the food being cooked. I have seen liquid collect in it, when the pressure did not build properly. The slot to put it is at the back of the instant pot. Place the condensation collector in the slot.
Instant Pot Lid
The lid has a number of parts that you want to be aware of – Silicone Sealing Ring, Steam Release Handle (Venting Knob), Floating Valve, and Anti-Block Shield.
Before first use, wash the inside of the lid well.
Steam Release Handle / Pressure Release Knob
Vent is the handle on the instant pot lid that you turn to either the sealing or venting position. For pressure cooking, you want to put it in the sealing position. To release pressure manually, you can move it to the venting position. But be careful to only do that in certain scenarios, so food does not come out of the instant pot due to the pressure being released too soon.
Pressure Release Knob can be removed for washing, however does not need washing after every use.
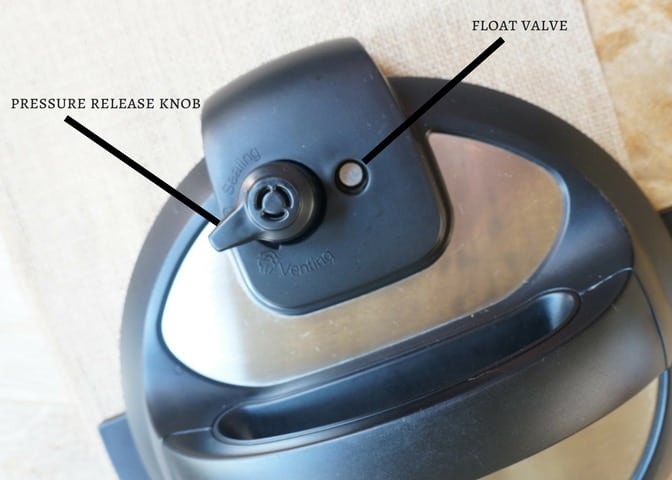
Depending on what you are cooking, make sure the venting knob is in the right position.
- Sealing Position: Traps the steam in the pressure cooker and builds up the pressure. This is the position you want to use for pressure cooking.
- Venting Position: Turn to venting position to release the stem after pressure cooking.
Pin / Float Valve / Valve
This is the pin that pops up when the instant pot builds pressure. After cooking, only open the instant pot lid after the pin has dropped. The pin being up signals that there is still pressure inside the pot.
In the left image, the pin is down, and in the right one the pin is up indicating that pressure is built up. No steam should be coming out of the instant pot once pressure is built.


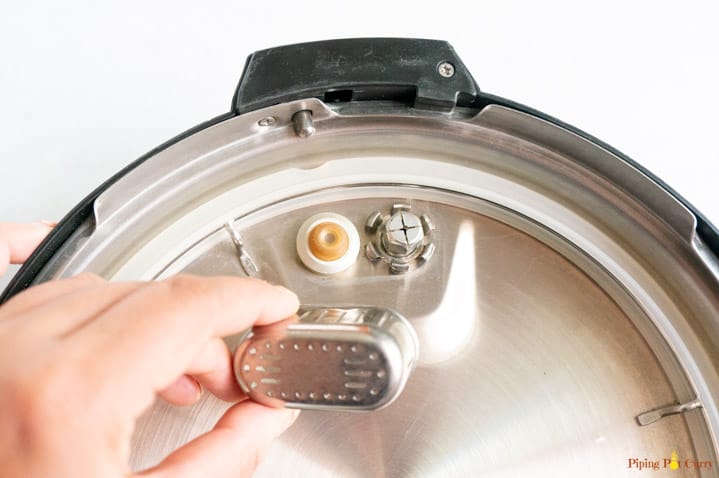
Anti-block Shield
The inside of the lid has the float valve on the left and the anti-block shield on the right. The anti-block shield protects the exhaust valve.
Before using the instant pot, remove and install the anti-block shield. To remove, gently push the shield on the side to lift it up. To place it back, position it in place and press it down.
Note: The shield is either round or has an elongated oval like shape in different instant pots.
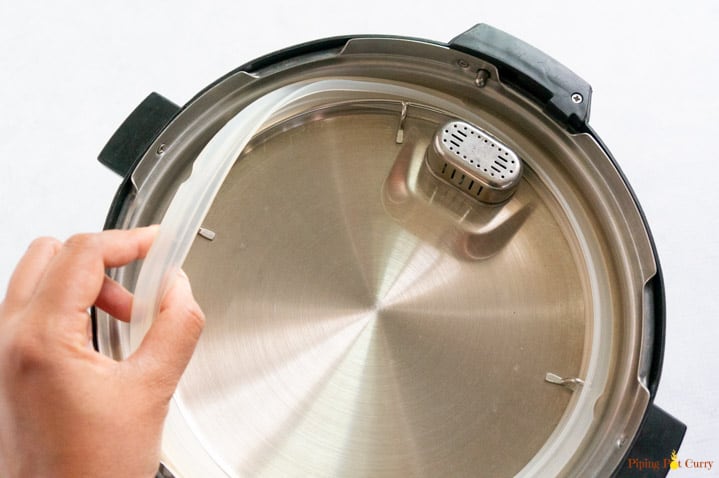
Sealing Ring
The Silicone Sealing Ring is an important part to enable pressure cooking. The sealing ring must be placed correctly else the instant pot will not seal and the pressure wont build. The silicone ring is dishwasher safe, however I recommend hand washing it to preserve it’s longer life.
Instant Pot recommends to not pull the sealing ring by force, as it can cause deformation and affect its function in sealing the pressure.
Before using the Instant Pot, remove and install the sealing ring on the lid.
Tip: It is a great idea to have a spare sealing ring at hand. It is also suggested to have one for cooking sweets, while another for cooking savory dishes, so that the odors don’t cross contaminate. Instant Pot sells a set of two, red and blue, so you can easily distinguish the savory and sweet foods sealing ring.
Did you know? Look for the triangle markings to close the lid. The triangle mark on the lid and the base unit should align for the lid to close.
To close the instant pot, place the lid on the base of the instant pot by lining up the triangle marks. Turn the lid clockwise, until you hear the beep and the triangle on the lid aligns with the close icon on the base unit. Turn counter clockwise to open the lid.
In the left image, the instant pot is open. In the right one, it is locked.


Did you know? The base unit has some great features – The handle on the base unit act as slots to hold the lid.

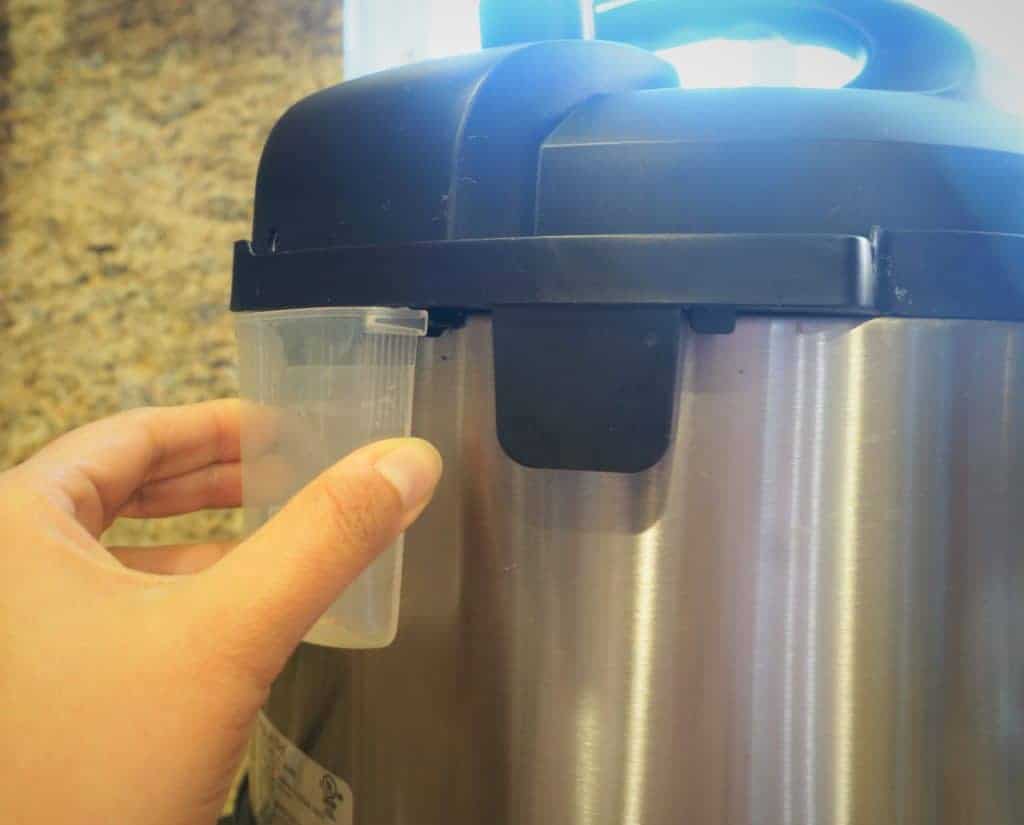
Accessories – Measuring Cup, Trivet, Ladles
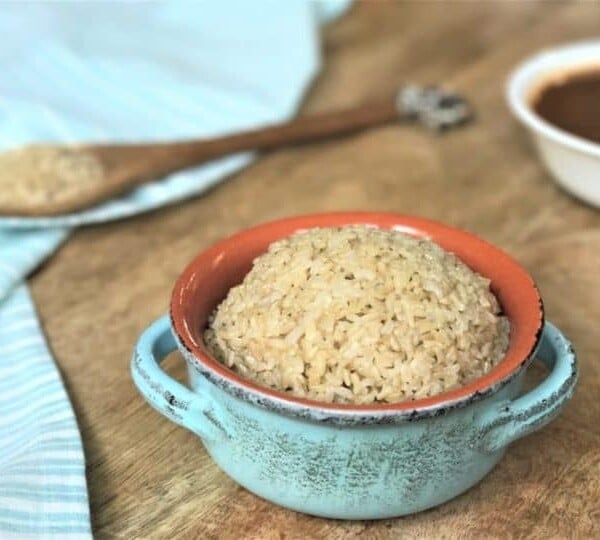
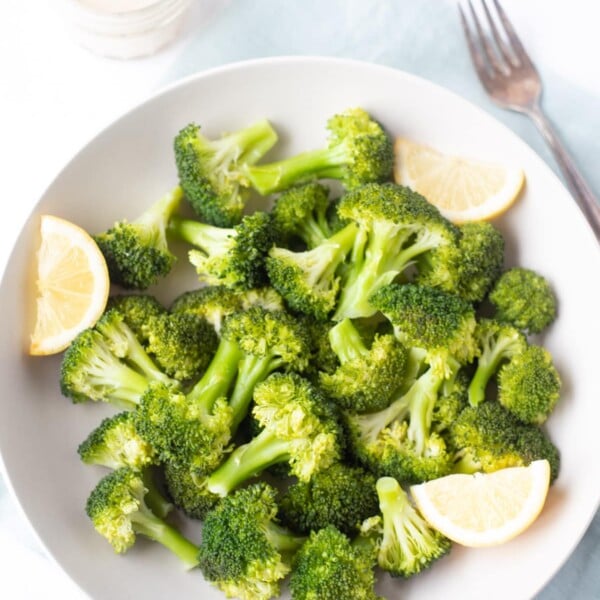
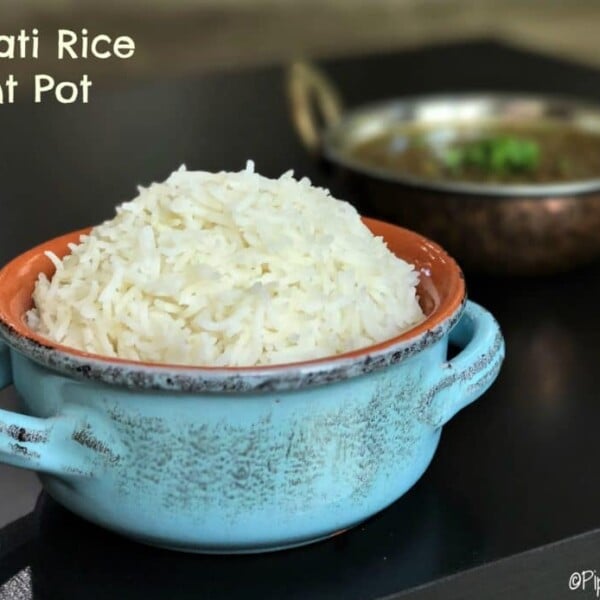
Trivet – This is the metal rack that you put inside the instant pot to keep food out of liquid such as for steaming and pot-in-pot cooking. You will find many recipes where I use the trivet such as basmati rice, brown rice and for steaming veggies.
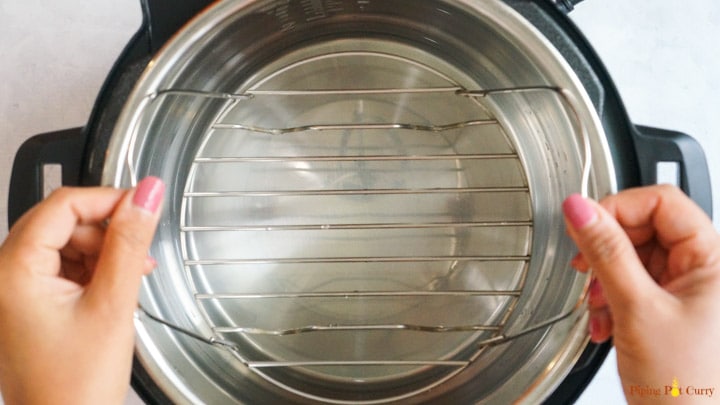
For situations, where I am cooking two dishes at a time such as Lentils and Rice, then I use a tall trivet so that the trivet does not submerge in the lentils in the main pot. Check the recipe here.
Measuring Cup – The one that comes with the instant pot is not the regular size, it is a rice measuring cup. It measures 1 cup = 180ml.
Ladles – Rice paddle and a Soup ladle.
Next Step: Water Test
Check out the post to complete the Initial Water Test to make sure everything is working properly with your instant pot and learn how it operates.
After the water test, you will be ready to try your favorite recipe.
I highly recommend to initially follow some recipes, rather than making adjustments. Find a trusted website for instant pot recipes, and then follow along. Feel free to ask questions, so you can be successful with your initial recipes.
Check out this post for 10 Easy Instant Pot Recipes for new owners. Leave a comment on the recipe or on any social media channel. I always respond to questions/comments.


hello Meeta, thank you for the tutorial on Instant Pot, meaning to buy one, lot of your recipes cooked in instant pot. I now know what to buy. Thank you so much for your time and effort to educate us on how to cook. I an so thankful, I latched on to your web site, by accident. Chris, my wife and I will be forever grateful. Satish, Chris
Hi Satish – Glad to hear that the guide was helpful to you!
I am confused about venting and sealing. What does the knob look like in the sealing position?
Hi Judy – The instant pot has the venting and sealing written on the lid. Some of the newer models such as ultra have a different pressure knob, where you have to press a button to vent, and turn to seal the pot. Hope that helps!
Dear friend. I do not have an instant pot but I do have a stove top pressure pot will it work with what you are teaching?
Hi Darlene – You can use a stovetop pressure cooker with most of my recipes for instant pot. The usual conversion is 1 whistle for every 3 minutes of pressure cooking with the instant pot. I hope that helps!
Thank you for this!!! I just bought an InstantPot and I have been afraid of using it – embarrassing!
Hi Denisse – Don’t be! You are not the only one. I hear this all the time. Just give it a go and I am sure you will love it.
What do the “D” and the “S” stand for on the Instant Pot “Cooking Time Tables” page?
(E.G. Pinto Beans D:25-30 minutes / S:6-9 minutes)
Hi Barbara – D is for dry beans and S for soaked. Hope that helps!
Can you share how you measure time after the pressure cooking is done. I usually monitor.. so leave it 5 mins after the 6 mins of pressure cooking are done. Isn’t there a way i can have a 5 min countdown on the cooker?
Hi Indu – The instant pot goes in keep warm mode after pressure cooking is done, and starts counting up the time. So it will show the display as “00:03” if it is 3 minutes after pressure cooking was completed and keep warm mode was started. If you press Cancel after the beep, then the timer and the keep warm mode turns off. Hope this helps.
Great review and description. Extremely helpful:)
All these recipes and stuff for pressure cooking…no instructions for how to use it as a slow cooker! Just a bunch of buttons with NO help!
Thank you! So much detailed, helpful information in just one post.
I have the 8-quart version of the Instant Pot under the Christmas tree for my wife.
This will be where I go to set it up for her. I’m looking forward to trying some of your recipes- they sound/look amazing!
Hey John – Yay for the best Christmas gift. I am sure your wife will love it. I would love to hear if you try any of the recipes!
Thank you so much for the post.It is very helpful for beginners,very detail and nicely explained.
Hey Manali – Glad to hear the post was helpful!